Difference between revisions of "Requisition Index"
| Line 1: | Line 1: | ||
| + | __TOC__ | ||
| + | |||
<h1>Creating Manual Requisitions</h1> | <h1>Creating Manual Requisitions</h1> | ||
Revision as of 16:10, 25 November 2019
Creating Manual Requisitions
Typically, you will create a Requisition from scratch if you want to order 1 or a small number of items outside your regular ordering sequence due to some unforeseen circumstance. If you need to order a lot of items, you will find it quicker to create the Requisition from a pre-stored template but see the below 'Creating a New Requisition from a Template' for more details on this, and also this [link] for maintaining the template.
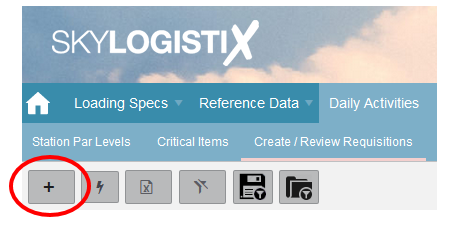
To create a Requisition from scratch you should take the add icon from the Create/ Review Requisitions page.
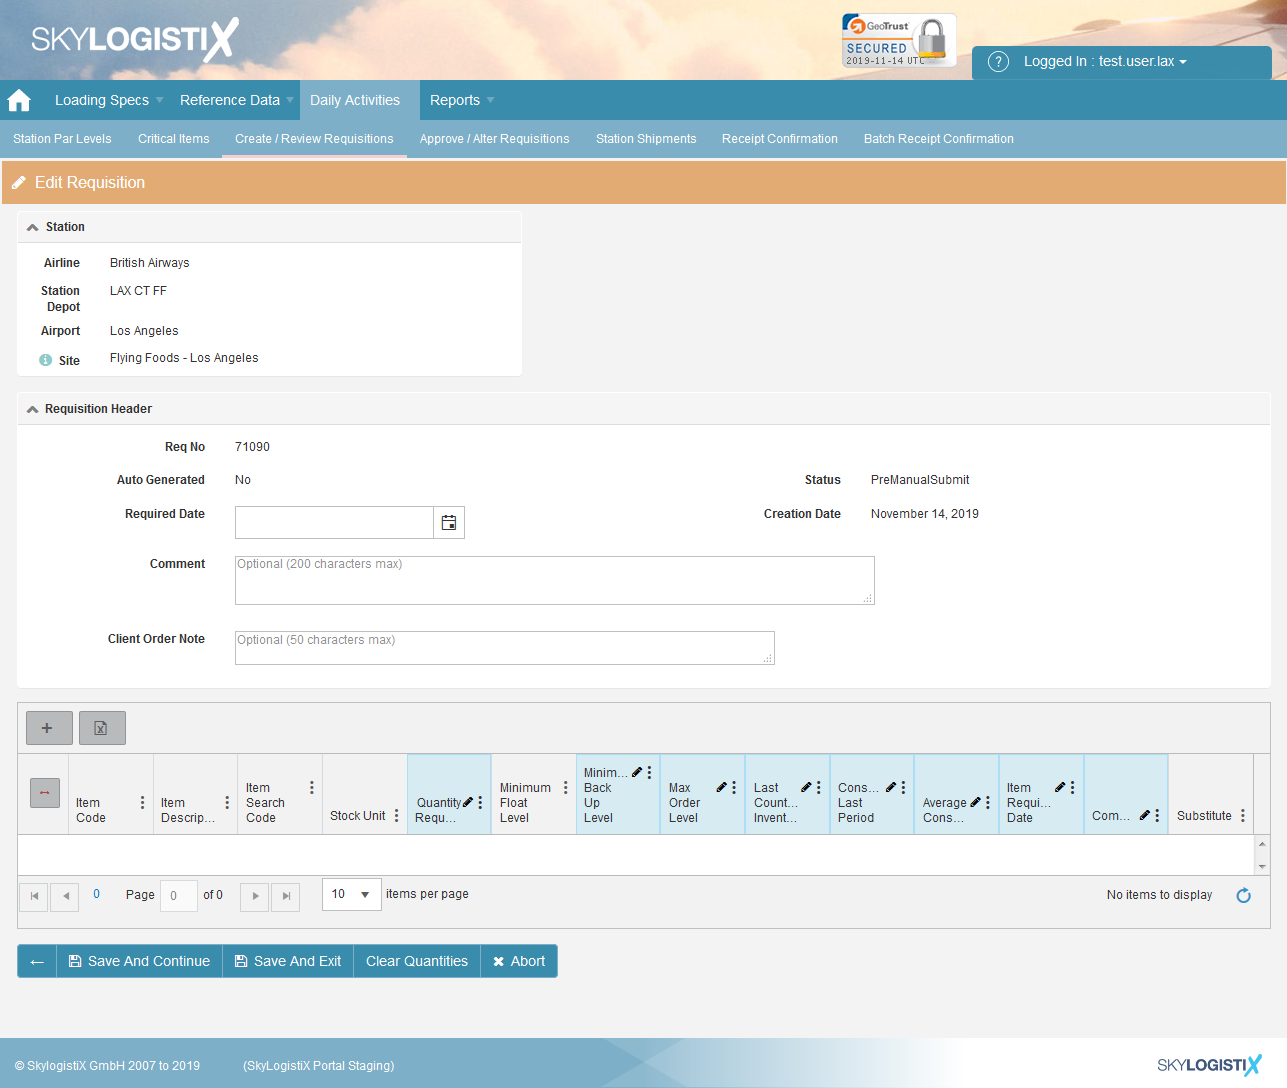
The following page will be displayed;
In the header section you enter the date you require the goods by and any comment you may like to record.
In the detail section you add the items you want by pressing the add icon.
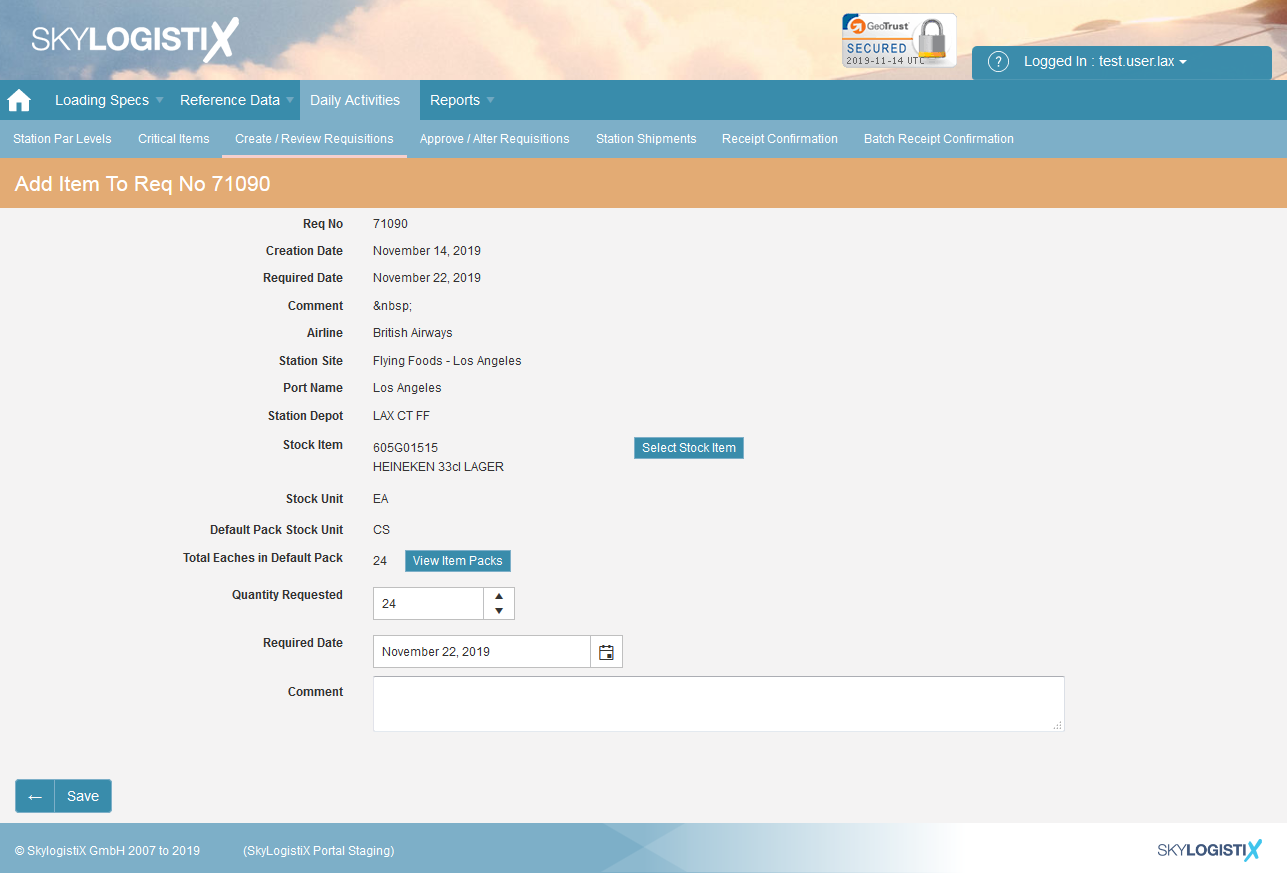
This will then display a screen allowing you to select the item (You simply select an item by pressing the “Select” Button, if you don’t see the item you want you can page though until you find it our use the filters by clicking the three dots on each column) and then add the required quantity.
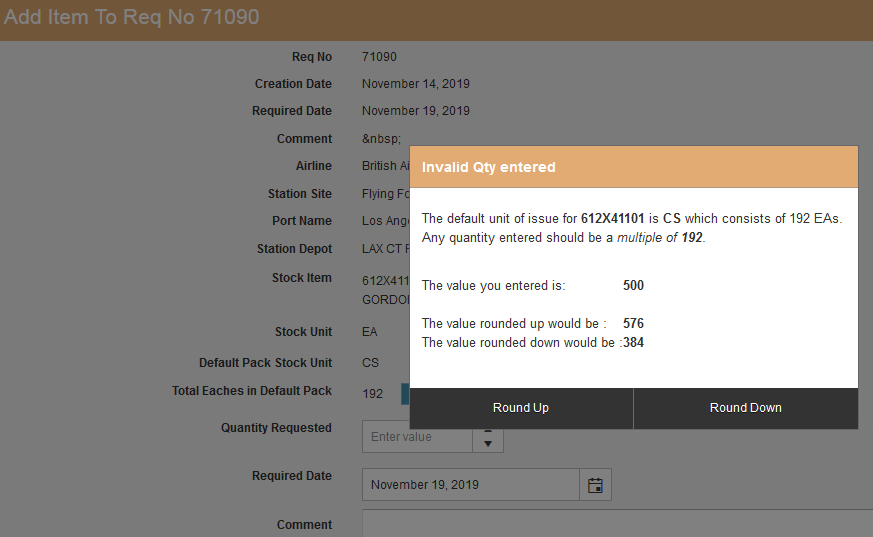
If you enter a quantity that is not a multiple of the default pack size, you will get the following pop up in which you will need to detail whether to round up or down accordingly.
After entering the header section and when you press the add button to select detail or you press the “Save” button the system performs a check to see if the date you requested is possible if it is not you will see a message similar to the one below;
Once you have added a line you will be returned to the page where you see the lines added so far and you can add another line by pressing Add Icon again.
.
You can continue to add lines until you have entered all the items you need. When you are ready to submit your Requisition to SkylogistiX press the “Submit” button, after this you will no longer be able to add to this Requisition so only press Submit when you have entered everything. If you wish to save and come back to the Requisition later use “Save and Exit” to save your work in this case the status of the Requisition will stay “Pre-Manual Submit” and you can come back to it later. Once you press Submit the status will change to “Awaiting Approval” which means SkylogistiX will review it. You will receive an email advising you that the Requisition has been successfully submitted for review.
On the main Create/Review Requisitions screen you will see that it is now at “Awaiting Approval” status – see below example.
Creating a New Requisition from a Template
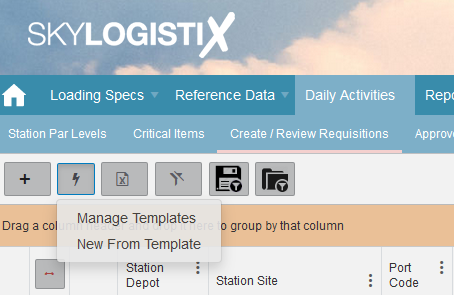
You can create new Templates or maintain your existing Templates by pressing from the main “Create/ Review Requisitions” page via the lightning bolt button at the top of the page;
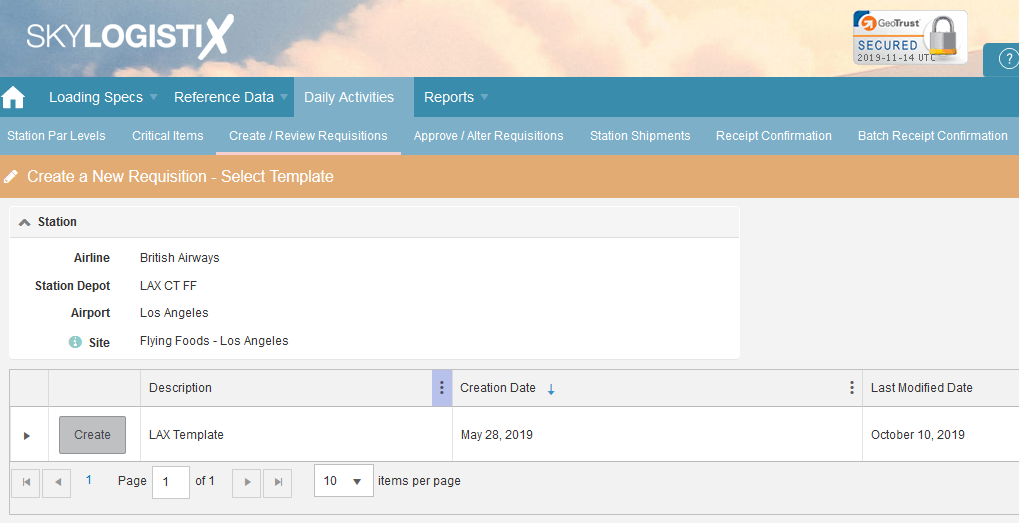
Once you press “Manage Templates” you will see a list of any existing templates for your station;
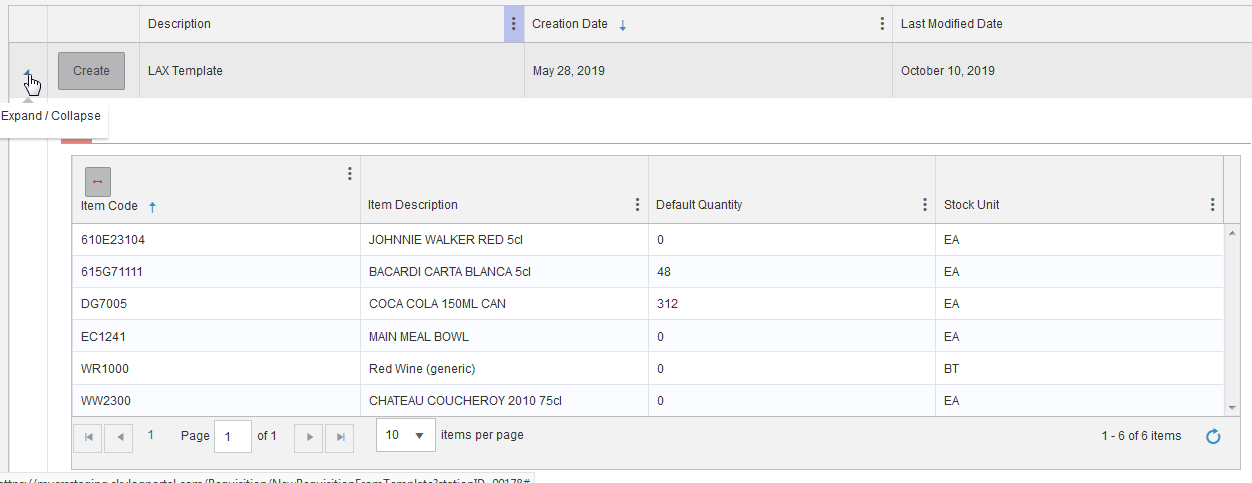
In the example above there is a template stored call “LAX Template”, to see the items in the template click the drop down arrow;
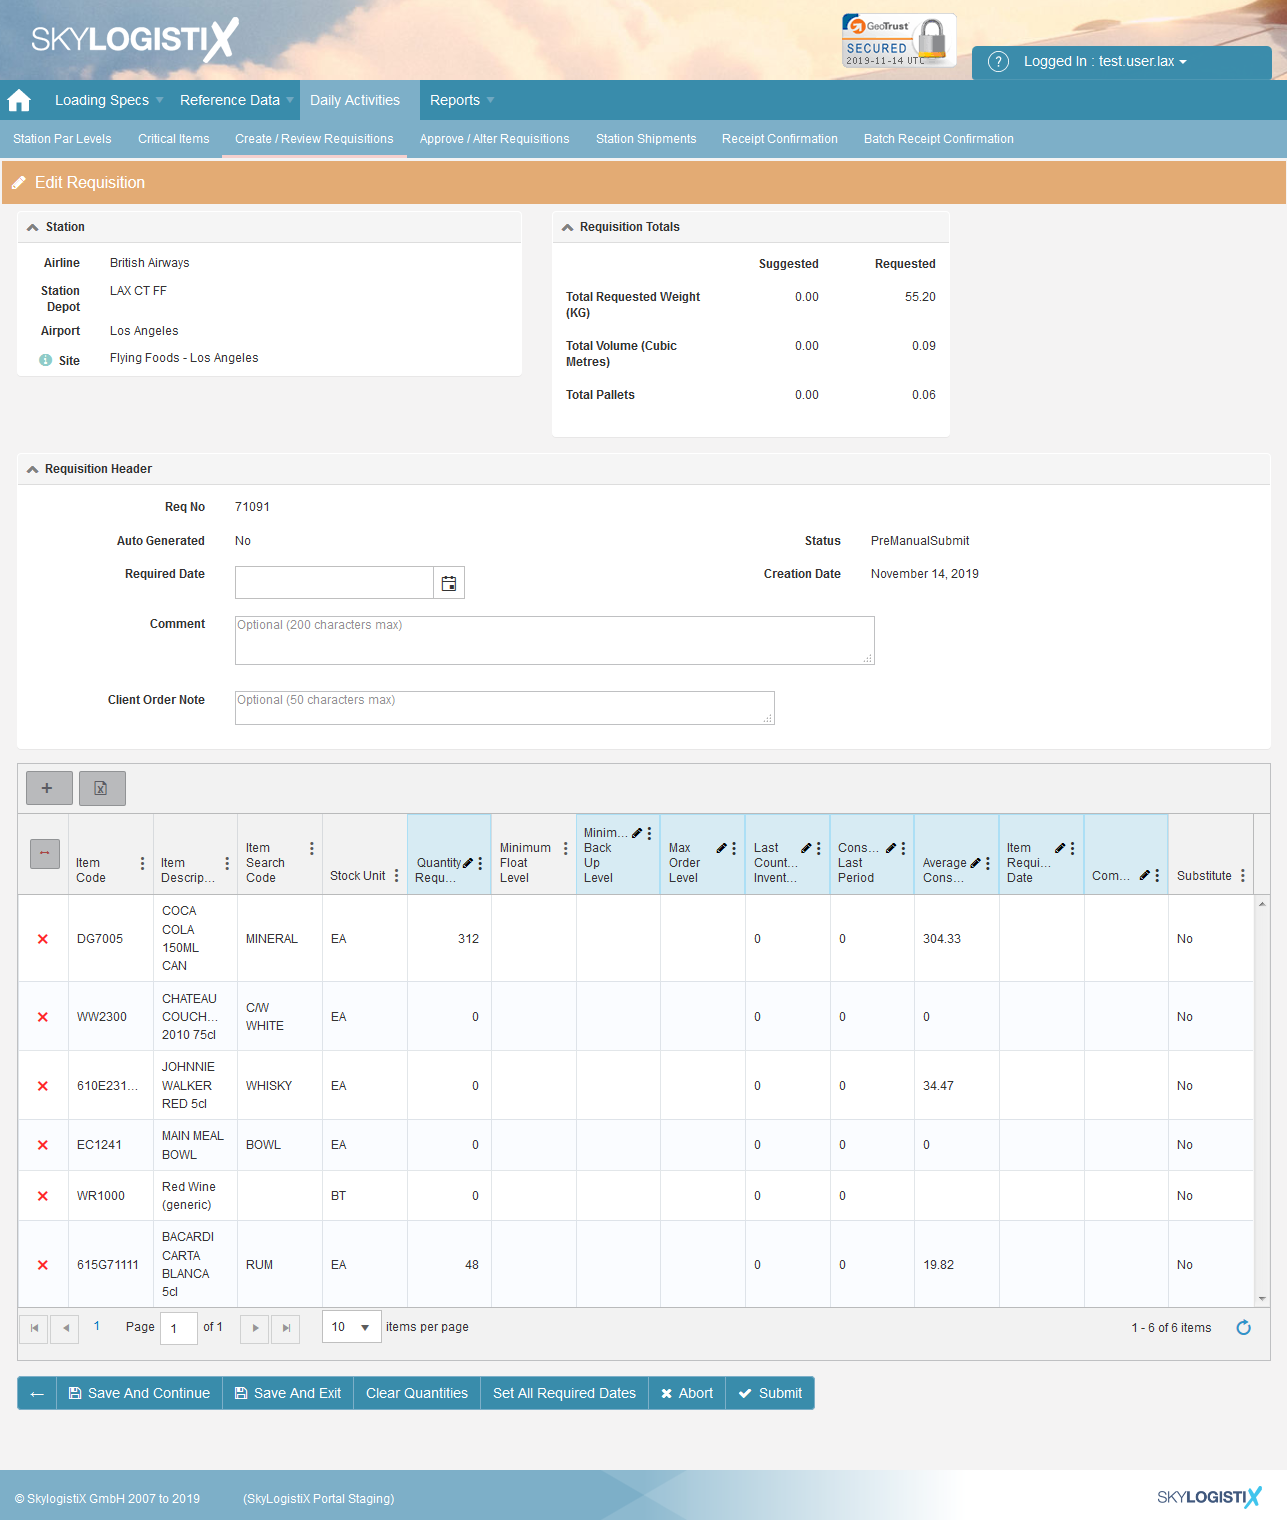
If you wanted to create a Requisition from this Template press the “Create” button. This will automatically create a new Requisition with all the items that are defined on the Template. In the example below you can see the Requisition with 6 items has been created.
From here you can edit the Quantities, add new lines or delete lines.
Then once ready you can submit your Requisition like in the example here that was referenced above.
