Difference between revisions of "PurchaseInvoice CommitCustom"
| Line 12: | Line 12: | ||
• You expect that in future the order will be split in multiple deliveries. | • You expect that in future the order will be split in multiple deliveries. | ||
| − | |||
<h1>Create deliveries</h1> | <h1>Create deliveries</h1> | ||
| Line 36: | Line 35: | ||
[[File:20210120 Items on Delivery.png|800px]] | [[File:20210120 Items on Delivery.png|800px]] | ||
| − | SkyLog will assign the the delivery the quantity requested (Approved Quantity) deducting the quantity already assigned to other deliveries. to amend the quantity press the edit icon and press | + | SkyLog will assign the the delivery the quantity requested (Approved Quantity) deducting the quantity already assigned to other deliveries. to amend the quantity press the edit icon and press [[20210120_Update.png]] to save the change |
[[File:20210120 Edit delivery item.png|800px]] | [[File:20210120 Edit delivery item.png|800px]] | ||
| Line 42: | Line 41: | ||
To remove items press the delete icon [[File:RemoveRemove.png]] next to the record you want to remove. | To remove items press the delete icon [[File:RemoveRemove.png]] next to the record you want to remove. | ||
| − | You can also add one item at at time by pressing the add icon [[File:Count_10.png]]. | + | You can also add one item at at time by pressing the add icon [[File:Count_10.png]], select the item and enter the quantity to be assigned to the delivery. |
| + | |||
| + | <h1>Submit your own delivery schedule</h1> | ||
| + | |||
| + | Once you have created all the deliveries, and assign the quantities | ||
Revision as of 15:01, 20 January 2021
Please use our [Tips and Tricks] page for understanding how the SkySuite portal works and how to navigate faster and easier.
When you press "We Commit to our own Custom Delivery Schedule", SkySuite will direct you to the Custom Delivery Schedule page. This option is appropriate in the following scenarios:
• You will commit to different quantities than requested
• You will deliver items on different dates
• You will deliver some of the items
• You expect that in future the order will be split in multiple deliveries.
Create deliveries
To create a new delivery record press the add Icon ![]() in the delivery section, the following pop-up will appear.
in the delivery section, the following pop-up will appear.
For delivery reference you can assign your own internal identification of the delivery. Also please add any relevant comments and press create.
You must create at least one delivery, and as many deliveries as it is required, provided the total quantity per item is less or equal the requested quantity.
Add items to a delivery
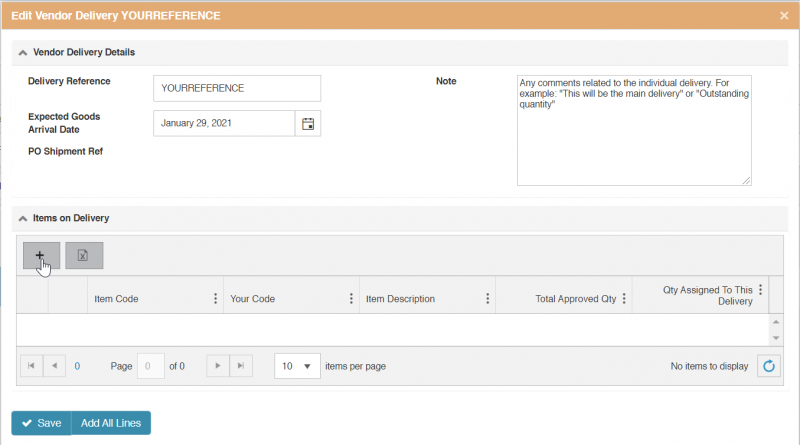
Once you have created a delivery, press the edit icon ![]() on the delivery you want to add items to.
on the delivery you want to add items to.
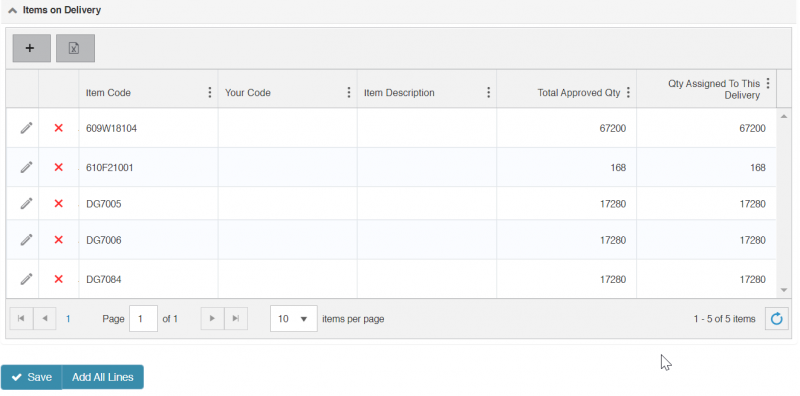
You can add all the lines not assigned to any delivery, press ![]()
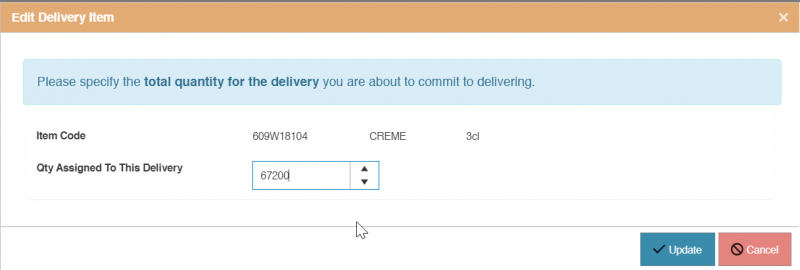
SkyLog will assign the the delivery the quantity requested (Approved Quantity) deducting the quantity already assigned to other deliveries. to amend the quantity press the edit icon and press 20210120_Update.png to save the change
To remove items press the delete icon ![]() next to the record you want to remove.
next to the record you want to remove.
You can also add one item at at time by pressing the add icon ![]() , select the item and enter the quantity to be assigned to the delivery.
, select the item and enter the quantity to be assigned to the delivery.
Submit your own delivery schedule
Once you have created all the deliveries, and assign the quantities


