Difference between revisions of "British Airways Forecasting"
| Line 35: | Line 35: | ||
<h3>Upload Forecast Change Document - Walkthrough</h3> | <h3>Upload Forecast Change Document - Walkthrough</h3> | ||
| − | If you wish to upload the forecast change document then follow the below steps, if instead you would like to do | + | If you wish to upload the forecast change document then follow the below steps, if instead you would like to do edit manually navigate to [[#Manually Change Forecast - Walkthrough|here]]. |
| − | |||
| − | |||
| − | |||
| − | |||
| − | |||
| − | |||
| − | |||
| − | |||
| − | |||
| − | |||
| − | |||
| − | |||
| − | |||
| − | |||
| − | |||
| − | |||
| − | |||
| − | |||
| − | |||
| − | |||
| − | |||
| − | |||
| − | |||
| − | |||
| − | |||
| − | |||
| − | |||
| − | |||
| − | |||
| − | |||
| − | |||
| − | |||
| − | |||
| − | |||
| + | To start, you will need to edit the template document with the items, quantities and instructions to be uploaded, when you open the docunent you will be presented with four main tabs | ||
| + | [[File:BA_FCST_5.PNG]] | ||
| + | Each tab allows you to alter the forecast in a slightly different way | ||
| + | [[File:BA_FCST_4.PNG]] | ||
| + | but there is an explanation on how each one works to the right | ||
| + | [[File:BA_FCST_6.PNG]] | ||
| + | Once you have entered the details that are required to be amended then select "Upload Forecast Change Document" from the drop down detailed above and select the file from your PC and upload it. | ||
| + | [[File:BA_FCST_3.PNG]] | ||
| + | [[File:BA_FCST_9.PNG]] | ||
| + | The following screen will then be presented which will detail all non-approved forecast changes (not just the ones uploaded by yourself) | ||
| + | [[File:BA_FCST_7.PNG]] | ||
| + | When you have reviewed the changes uploaded the approval tick column on the right hand side of the screen needs to be ticked for all items you wish to change (note: if you filter you will only select all the records that are filtered) | ||
| + | [[File:BA_FCST_8.PNG]] | ||
| + | Once ready just press "Approve Selected" at the bottom of the page. | ||
Revision as of 13:38, 14 April 2020
Contents
British Airways Forecasting
This help wiki page will document how the BA forecast currently works, how to amend items/ quantities and also troubleshooting to issues you may face.
Overview of the forecast process
As of today the BA forecast has been uploaded using past consumption figures provided to Skylog via the BA planning team, due to this all items are subject to manual change which we will detail below in this page on how to achieve.
Suggested quantities for station orders comes from the 'Network Analysis' forecast (also known as the 'NWA' forecast) which is where all high level forecast data is held, but the NWA forecast flows into the 'NWA Demand by Warehouse' forecast which sums up all the items per warehouse, that in turn flows into the MRP planning algorithms. Once these figures are in the MRP the system will then suggest quantities to be ordered from suppliers.
Amending the active forecast
Now you know all about the background to the forecasting in SkyLog now we will discuss how to amend the active forecast.
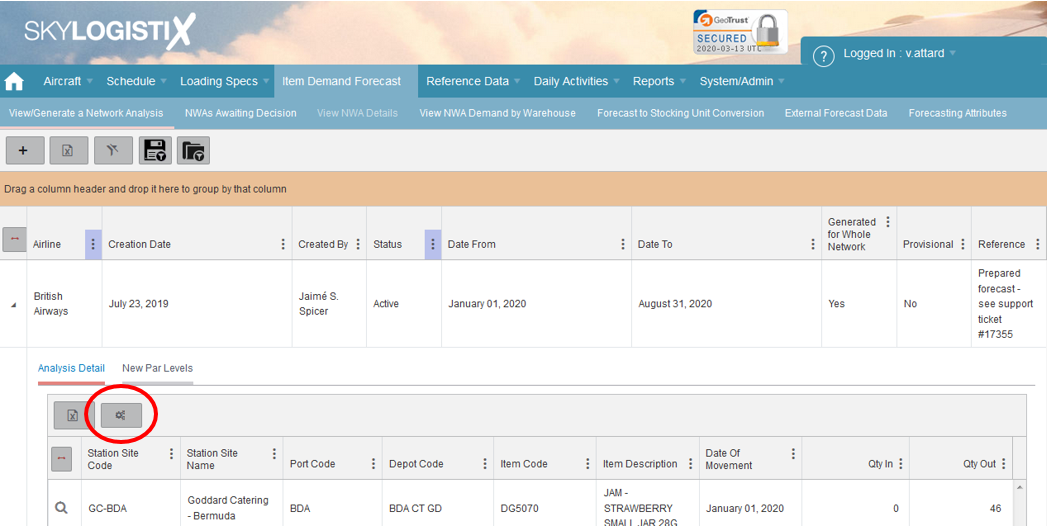
You will firstly need to navigate to the main forecast page: https://rsprod.skylogportal.com/NetworkAnalysis and find the 'Active' status forecast and click the drop down, you will see there is a cog button;
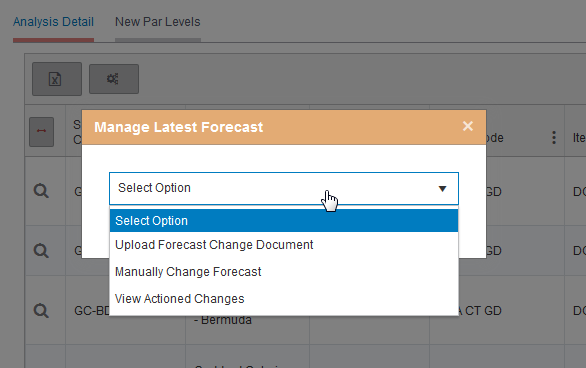
Three drop down options will be presented;
- Upload Forecast Change Document - You can use the forecast amendment template document to upload mass changes
- Manually Change Forecast - Instead of using the excel template you can instead manually alter the forecast via the portal
- View Actioned Changes' - All changes that have been actioned against the forecast can be viewed here for audit purposes
Upload Forecast Change Document - Walkthrough
If you wish to upload the forecast change document then follow the below steps, if instead you would like to do edit manually navigate to here.
To start, you will need to edit the template document with the items, quantities and instructions to be uploaded, when you open the docunent you will be presented with four main tabs
Each tab allows you to alter the forecast in a slightly different way
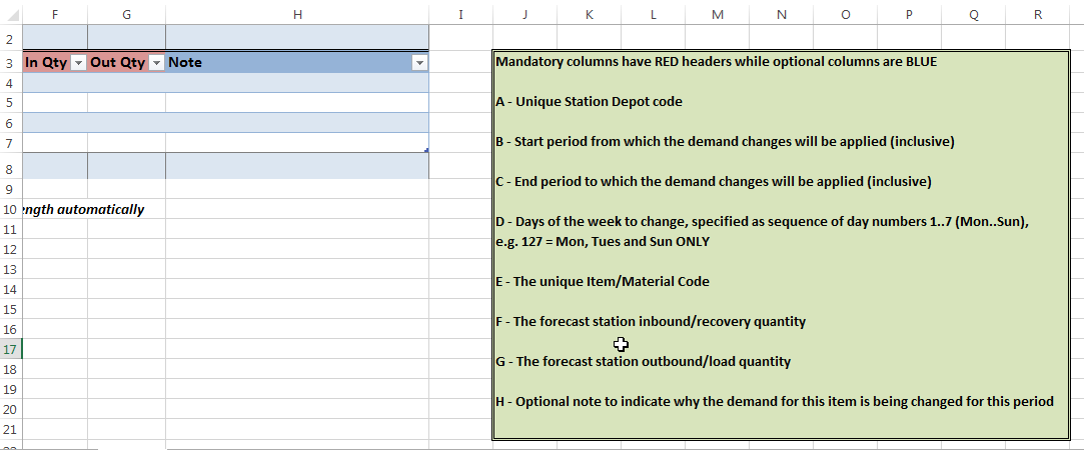
but there is an explanation on how each one works to the right
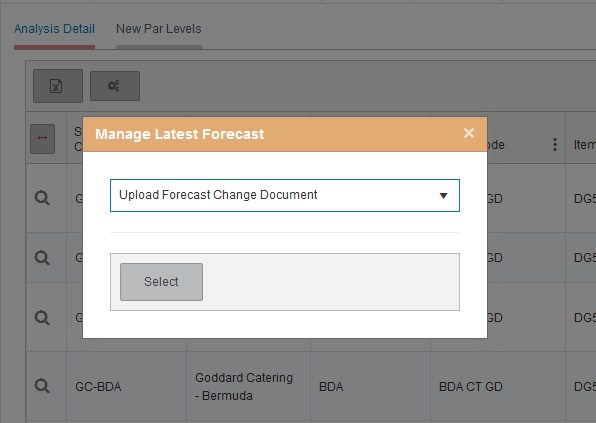
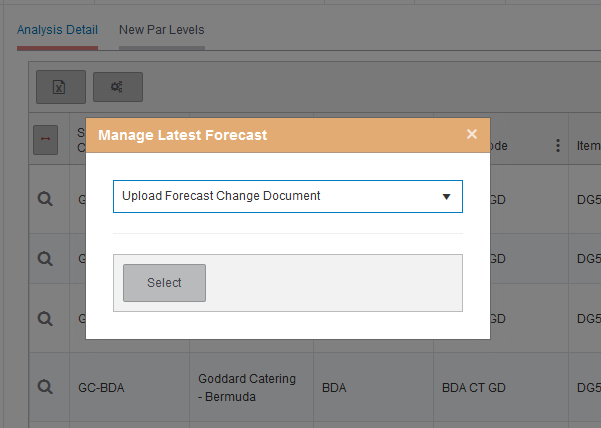
Once you have entered the details that are required to be amended then select "Upload Forecast Change Document" from the drop down detailed above and select the file from your PC and upload it.
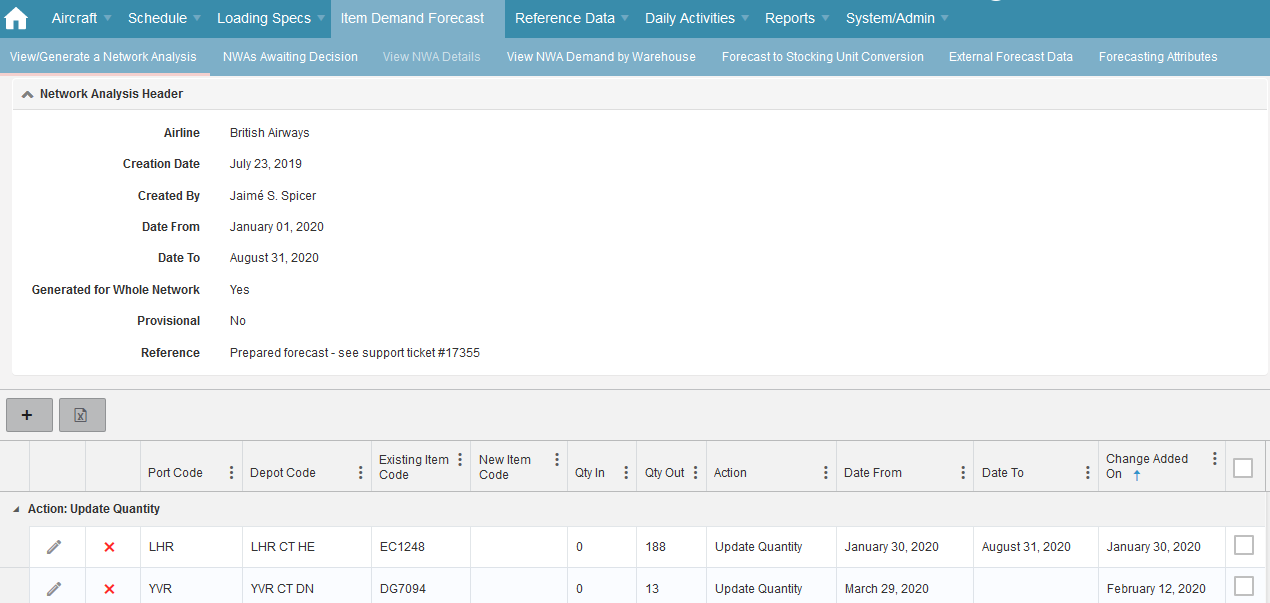
The following screen will then be presented which will detail all non-approved forecast changes (not just the ones uploaded by yourself)
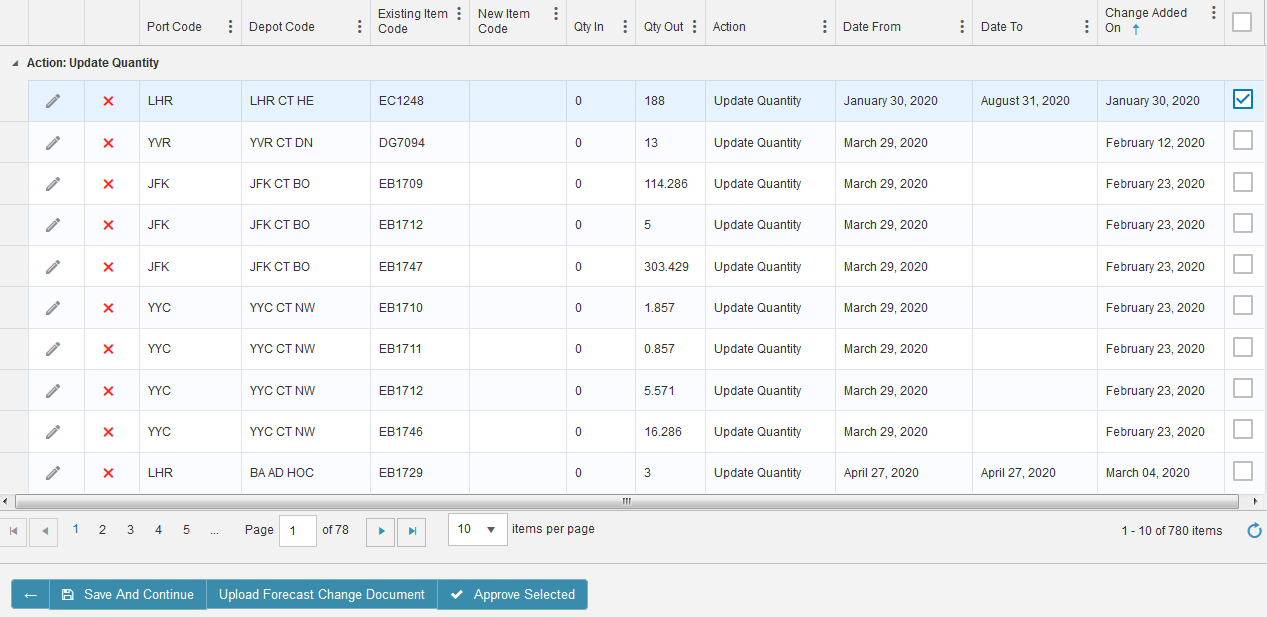
When you have reviewed the changes uploaded the approval tick column on the right hand side of the screen needs to be ticked for all items you wish to change (note: if you filter you will only select all the records that are filtered)
Once ready just press "Approve Selected" at the bottom of the page.
Manually Change Forecast - Walkthrough
Troubleshooting
Why isn't there any demand against my item in the MRP?
The most commonly asked question
