Difference between revisions of "Requisition Index"
(Updated to use Tips and tricks template, fixed some grammatical errors, updated large images to use thumbnails, removed excess whitespace) |
|||
| Line 65: | Line 65: | ||
Then once ready you can submit your Requisition like in the example [[#Submitting your Requisitions|'''here''']] which was referenced above. | Then once ready you can submit your Requisition like in the example [[#Submitting your Requisitions|'''here''']] which was referenced above. | ||
| + | |||
| + | =Reviewing an Automated Requisition= | ||
| + | Depending upon your station configuration, requisitions could be automatically generated by the system. The requisition will be available for your review on the “Create/ Review Requisitions” page. It is suggested to review the requisition within one workday from the requisition “Creation Date”. | ||
| + | |||
| + | Take the “Edit” icon of the requisition with “Awaiting Station Review” status: | ||
| + | |||
| + | You will be presented with the requisition details: | ||
| + | |||
| + | * '''Requisition Totals''' – Total calculated weight, volume, and number of pallets of the requisition quantities. | ||
| + | * '''Requisition No''' – The number of the requisition. | ||
| + | * '''Requisition Date''' – Enter the date by which you expect all items on the requisition to be delivered (the latest date if there are multiple dates at the item line level date). | ||
| + | * '''Preferred Transport Mode''' – Select from the transport modes available to your station. | ||
| + | * '''Comment''' (Optional) – Enter a Comment. | ||
| + | * '''Client Order Note''' (Optional) – Enter a Client Order Note. | ||
=Tracking a Requisition Status= | =Tracking a Requisition Status= | ||
Revision as of 22:38, 10 July 2023
Please use our Tips and Tricks page for understanding how the SkySuite portal works and how to navigate faster and easier.
Contents
Creating Manual Requisitions
Typically, you will create a Requisition from scratch if you want to order 1 or a small number of items outside your regular ordering sequence due to some unforeseen circumstance. If you need to order a lot of items, you will find it quicker to create the Requisition from a pre-stored template but see the below 'Creating a New Requisition from a Template' for more details on this, and also this [link] for maintaining the template.
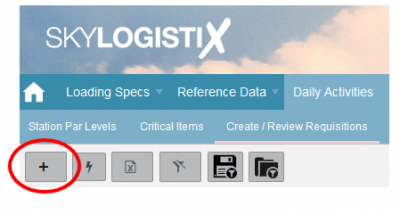
To create a Requisition from scratch you should take the add icon from the Create/ Review Requisitions page.
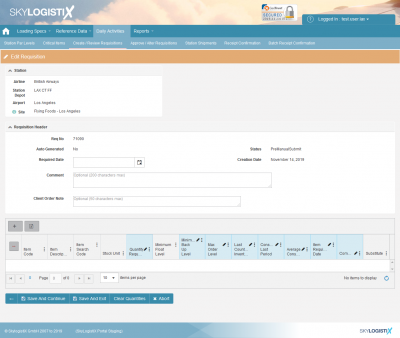
The following page will be displayed;
In the header section you enter the date you require the goods by and any comment you may like to record.
In the detail section, you add the items you want by pressing the add icon.
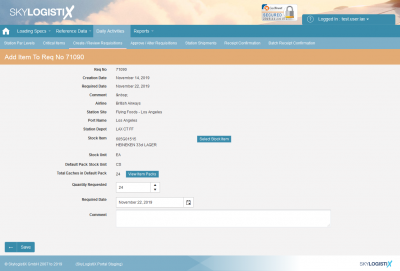
This will then display a screen allowing you to select the item (You simply select an item by pressing the "Select" button, if you don’t see the item you want you can page through until you find it or use the filters by clicking the three dots on each column) and then add the required quantity.
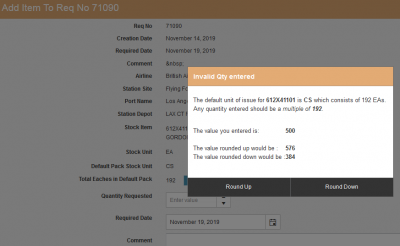
If you enter a quantity that is not a multiple of the default pack size, you will get the following pop-up in which you will need to detail whether to round up or down accordingly.
After entering the header section and when you press the add button to select detail or you press the "Save" button the system performs a check to see if the date you requested is possible if it is not you will see a message similar to the one below;
Once you have added a line you will be returned to the page where you see the lines added so far and you can add another line by pressing Add Icon again.
Submitting your Requisitions
You can continue to add lines until you have entered all the items you need. When you are ready to submit your Requisition to SkylogistiX press the "Submit" button. After this, you will no longer be able to add to this Requisition so only press Submit when you have entered everything. If you wish to save and come back to the Requisition later use "Save and Exit" to save your work in this case the status of the Requisition will stay "Pre-Manual Submit" and you can come back to it later. Once you press Submit the status will change to "Awaiting Approval" which means SkylogistiX will review it. You will receive an email advising you that the Requisition has been successfully submitted for review.
On the main Create/Review Requisitions screen you will see that it is now at "Awaiting Approval" status – see below example.
Creating a New Requisition from a Template
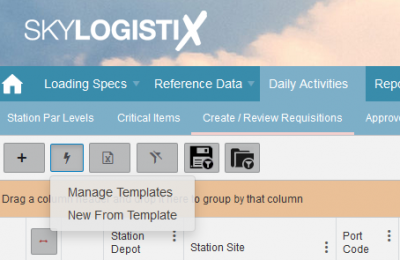
You can create new Templates or maintain your existing Templates by pressing the 'Lightening Bolt' icon from the main "Create/ Review Requisitions" page;
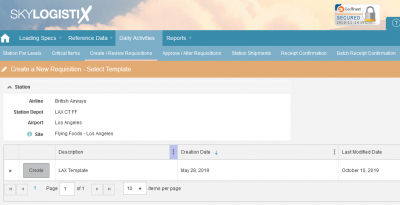
Once you press "Manage Templates" you will see a list of any existing templates for your station;
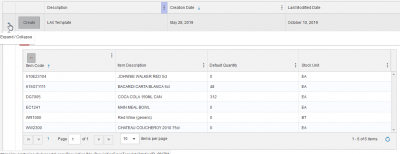
In the example above there is a template stored call "LAX Template", to see the items in the template click the drop-down arrow;
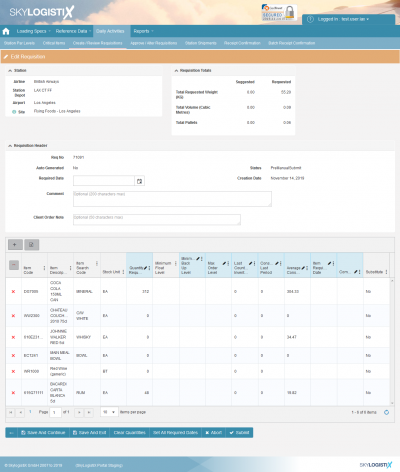
If you wanted to create a Requisition from this Template press the "Create" button. This will automatically create a new Requisition with all the items that are defined on the Template. In the example below, you can see the Requisition with 6 items has been created.
From here you can edit the Quantities, add new lines or delete lines.
Then once ready you can submit your Requisition like in the example here which was referenced above.
Reviewing an Automated Requisition
Depending upon your station configuration, requisitions could be automatically generated by the system. The requisition will be available for your review on the “Create/ Review Requisitions” page. It is suggested to review the requisition within one workday from the requisition “Creation Date”.
Take the “Edit” icon of the requisition with “Awaiting Station Review” status:
You will be presented with the requisition details:
- Requisition Totals – Total calculated weight, volume, and number of pallets of the requisition quantities.
- Requisition No – The number of the requisition.
- Requisition Date – Enter the date by which you expect all items on the requisition to be delivered (the latest date if there are multiple dates at the item line level date).
- Preferred Transport Mode – Select from the transport modes available to your station.
- Comment (Optional) – Enter a Comment.
- Client Order Note (Optional) – Enter a Client Order Note.
Tracking a Requisition Status
Once you have submitted a Requisition as described in the section above, the next step is a review by SkylogistiX. As previously described until that review takes place the Requisition will be at "Awaiting Approval" status. Once it has been reviewed by SkylogistiX the status will move to either "Rejected" or "Outstanding" and you will receive an email telling you that the Requisition has now been approved or rejected. If approved, it is possible that not all the items and quantities you requested have been approved and therefore some of the quantities you requested may have been altered. If you want to check what quantities have been approved follow the steps described below.
The requisition will not stay at the "Outstanding" status very long because as soon as it reaches Outstanding status the system will automatically begin sending the instructions to the various warehouses and suppliers to begin preparing the shipments. Once all those instructions have been sent to warehouses and suppliers the Requisition will move to "Completed" status (for certain configurations there are other steps between Outstanding and Completed see earlier note in section 5.5) this does not mean that the shipments against this Requisition have been completed just that the Requisition processing step has completed. To track the individual status for the shipments generated as a result of the Requisition follow the steps described below.
Checking what Quantities/ Items have been approved
Once you receive the email telling you your Requisition has been approved you can go to the "Create/ Review Requisitions" page (see section 5 above for how to navigate to this page). Your requisition will now be a status "Complete" (or for certain configurations it may have another status such as "Fully Scheduled", "Fully Agreed" etc. – see earlier notes above for details). To view the details, click the show icon.
The following page will be displayed;
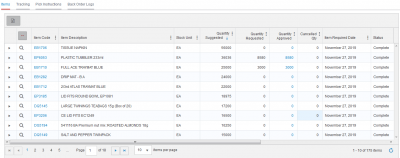
The suggested Quantity is what was proposed by the system (this will be zero for manually created requisitions). The requested quantity is what was requested by the station and the approved quantity is what SkylogistiX has approved. You can make an excel copy of the confirmed quantities by pressing the excel icon button.
Tracking the Individual Shipments against your Requisition
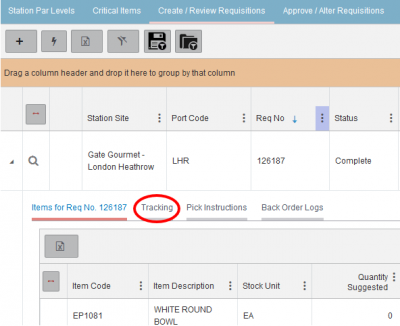
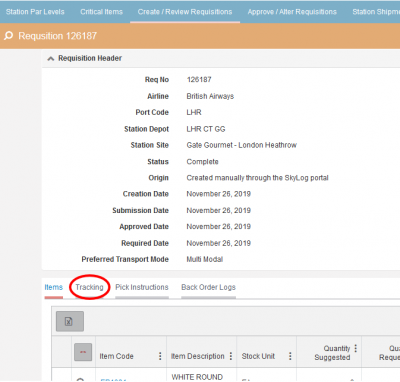
As previously described a single Requisition can generate multiple shipments depending on the source of supply and the stock availability. To view the individual shipments against your Requisition you should press the "Tracking" tab from the screen described above, or by clicking the drop-down from the main ‘Create/ Review Requisitions’ page.
OR
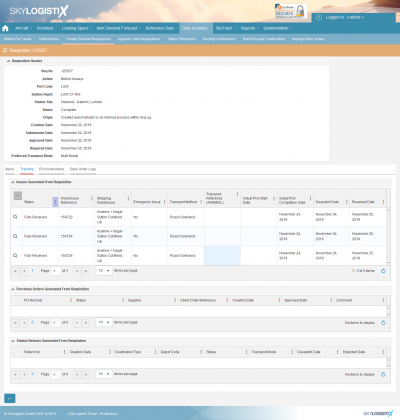
This will show you all the shipment instructions generated as a result of your Requisition.
There are 3 different categories of shipment:
- Issue – Goods are to be issued from a Central/ Regional warehouse to your station.
- Purchase Order – The goods are being shipped directly from a supplier to your station.
- Return – Means you have a surplus and you should return these goods as instructed by SkylogistiX.
See below for an example of the screen you will see if you press the "Track" button as described above.
In the above example, the only type of shipments generated were Issues. There are three and the source in both cases is the Kuehne + Nagel Sutton Coldfield warehouse, we also see that they have been fully received.
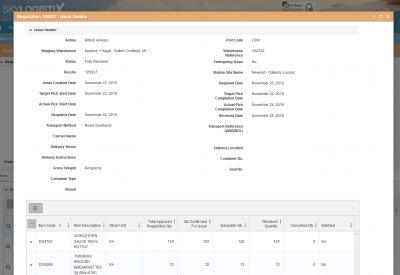
Against any issue, you can view the details of the issue by pressing the "Show" icon against the Issue you want to view in more detail. This will then show you the status/ tracking details of the Issue plus all the items on the issue as illustrated below;
In the above example on the header section, we see that the issue has a Target Pick completion date of 24th November, and was actually picked and despatched on 24th November and arrived on the 25th November, a day late to the planned arrival date which was the 24th of November.
In the line details we see the Confirmed Requisition Quantity per item and as well as the quantity shipped and the quantity received.
Anything not shipped to you will go onto a backorder and will be shipped via a separate issue which can be viewed in the same way as the main issue.
