Difference between revisions of "SkySuiteMobile:Index"
| Line 1: | Line 1: | ||
| − | + | [[File:SkySuiteMobile icon android.png|100px]] | |
| + | SkySuiteMobile is the mobile part of SkySuite products. The mobile application is currently available for Android devices. | ||
| + | This application includes some modules like Inventory or Trolley assets scan. | ||
| − | |||
| − | |||
| − | |||
| − | |||
== Connection== | == Connection== | ||
| Line 27: | Line 25: | ||
Click on Settings icon [[File:SkySuiteMobile settings button.png|40px]] to see Settings screen. <br> | Click on Settings icon [[File:SkySuiteMobile settings button.png|40px]] to see Settings screen. <br> | ||
[[File:SkySuiteMobile settings.png|200px]] | [[File:SkySuiteMobile settings.png|200px]] | ||
| + | |||
Choose a value in the list and click on Save. Selected value will be displayed in header of Login screen. | Choose a value in the list and click on Save. Selected value will be displayed in header of Login screen. | ||
| Line 32: | Line 31: | ||
Once you are logged in, Modules screen will be displayed. Available modules depend on your profile access. <br> | Once you are logged in, Modules screen will be displayed. Available modules depend on your profile access. <br> | ||
[[File:SkySuiteMobile modules.png|200px]] | [[File:SkySuiteMobile modules.png|200px]] | ||
| + | |||
== Module Scan Trolley Assets== | == Module Scan Trolley Assets== | ||
| Line 94: | Line 94: | ||
If there is a problem with your account, an error message will be displayed. Current screen is displayed. You can click on Cancel and go back to previous screen. Please contact support for assistance. | If there is a problem with your account, an error message will be displayed. Current screen is displayed. You can click on Cancel and go back to previous screen. Please contact support for assistance. | ||
| − | |||
| Line 114: | Line 113: | ||
===Count/Recount selection=== | ===Count/Recount selection=== | ||
| − | |||
| − | |||
| − | |||
| − | + | {| class="wikitable" | |
| − | Once data are loading, you can see Counts & Recounts. Number of each is displayed between parenthesis. Below, there is 290 pending counts and 10 awaiting recounts. | + | |- |
| − | [[File:SkySuiteMobile count.png|200px]] | + | |style="width: 50%"| Click on Inventory button. Count screen is displayed. <br> |
| + | During loading of data, buttons are not available (Wait + loading icon). | ||
| + | |style="width: 50%"| Once data are loading, you can see Counts & Recounts. Number of each is displayed between parenthesis. Below, there is 290 pending counts and 10 awaiting recounts. | ||
| + | |- | ||
| + | | [[File:SkySuiteMobile count loading.png|200px]] | ||
| + | || [[File:SkySuiteMobile count.png|200px]] | ||
| + | |} | ||
| Line 129: | Line 131: | ||
* Expected count date<br> | * Expected count date<br> | ||
To continue, click on Next (first button is for selected count, second button is for selected recount). | To continue, click on Next (first button is for selected count, second button is for selected recount). | ||
| + | |||
===Date of count=== | ===Date of count=== | ||
| Line 139: | Line 142: | ||
| − | Click on | + | Click on Proceed to continue. While data are sent to server, buttons are unavailable (Wait + loading icon). Once done, Count items page is displayed. |
===Count/Recount items=== | ===Count/Recount items=== | ||
| Line 159: | Line 162: | ||
By clicking on Edit icon [[File:SkySuiteMobile comment button.png|40px]] you can fill a comment on item. Once a comment is defined, border color changes (if you click on Edit icon again, you can see the comment and modify it).<br> | By clicking on Edit icon [[File:SkySuiteMobile comment button.png|40px]] you can fill a comment on item. Once a comment is defined, border color changes (if you click on Edit icon again, you can see the comment and modify it).<br> | ||
| + | |||
| + | If you want to access quickly to a specific item, you can scan its barcode.<br> Click on QR icon [[File:SkySuiteMobile qr button.png|40px]], scan a barcode, then if item exists in list, it will be highlighted. | ||
| + | Example: | ||
| + | [[SkySuiteMobile count scan.png|200px]] | ||
| + | |||
Several actions are possible on this screen: | Several actions are possible on this screen: | ||
* Add an item (see next chapter) | * Add an item (see next chapter) | ||
| − | * Save & Continue | + | * Save & Continue : Data will be sent to server. Once done, a confirmation message is shown and current screen is refreshed and you can continue. Highlighted borders are removed. |
| − | * Save & Exit | + | * Save & Exit : Data will be sent to server. Once done, a confirmation message is shown and Module screen is displayed. |
| − | * Submit | + | * Submit : All quantities must be filled to submit count. An error message is displayed if there is some missing value. Once clicked, data will be sent to server. Once done, a confirmation message is shown and Module screen is displayed. |
| + | In case of problem with data, an error message will be displayed. Current screen is displayed. Please contact support for assistance. | ||
| + | ===Add an item=== | ||
| + | |||
| + | When you click on "Add an item" on Count items page, Add page is displayed. <br> | ||
| + | [[File:SkySuiteMobile count add.png|200px]] | ||
| + | |||
| + | |||
| + | You can scan or type a value to get list of items that can be added according to typed value. The types value will be used as a wildcard to get matching items. | ||
| + | |||
| + | If only one item is available, it will be automatically selected. <br> Otherwise, you will have to choose a value in the list. | ||
| + | |||
| + | To add the selected item, you have to fill backup quantity.<br> | ||
| + | |||
| + | After add, item will be added at the end of the list (Count items screen). | ||
| Line 174: | Line 196: | ||
The menu is displayed above current screen.<br> | The menu is displayed above current screen.<br> | ||
[[File:SkySuiteMobile menu.png|200px]] | [[File:SkySuiteMobile menu.png|200px]] | ||
| + | |||
You can access several pages from links: | You can access several pages from links: | ||
Revision as of 15:53, 19 October 2023
SkySuiteMobile is the mobile part of SkySuite products. The mobile application is currently available for Android devices. This application includes some modules like Inventory or Trolley assets scan.
Contents
Connection
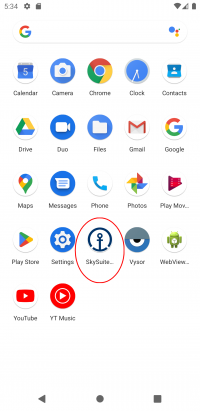
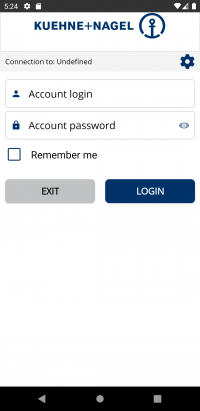
| Click on application icon to start application. | Splash screen is displayed during loading. | Then Login screen is displayed. |
|
|
|
To connect, you have to fill Login and Password (both values are mandatory).
If you want, you can check "Remember me". Login value will be saved and displayed next time the screen is displayed.
By default, password characters are hidden, but you can show characters by clicking Eye icon ![]() (icon changed). Another click on the same button will hide typed characters.
(icon changed). Another click on the same button will hide typed characters.
Note: Environment must also be configured. "Undefined" is displayed on top until one environment is chosen.
Click on Settings icon ![]() to see Settings screen.
to see Settings screen.
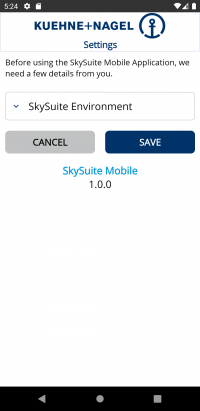
Choose a value in the list and click on Save. Selected value will be displayed in header of Login screen.
Once you are logged in, Modules screen will be displayed. Available modules depend on your profile access.
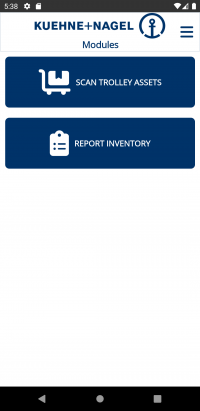
Module Scan Trolley Assets
After login, you have access to "Scan Trolley Assets" module (there is no restriction according to your profile role). In this module, you will be able to scan assets at a location.
Define location
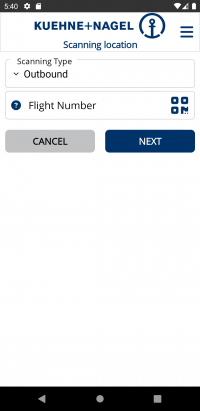
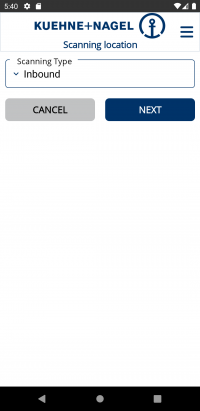
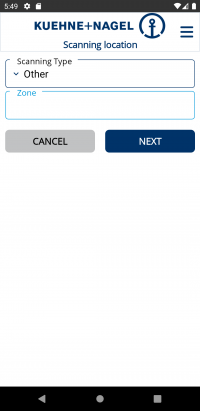
First screen is to select and define location for scanned trolleys. As you can be below, there is 3 types of location (with specific fields). By default, Outbound type is selected.
To change location type, just select a value after click on field.
Once Location is selected and completed, click on Next to continue.
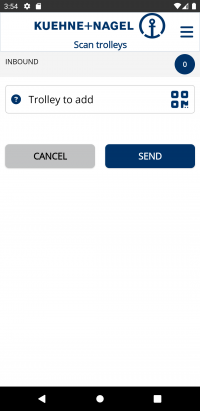
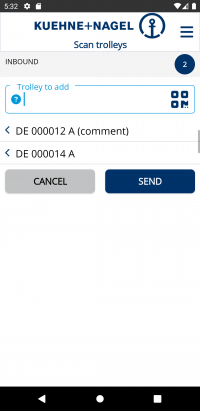
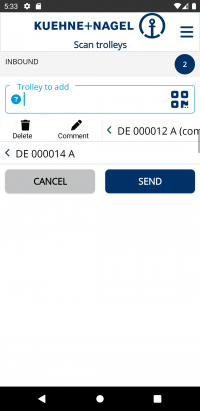
Scan assets at location
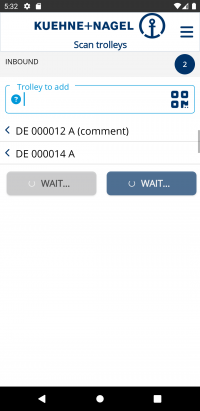
Once all item are added, click on Send to send data to server.
During send of data, buttons are not available. "Wait" is displayed with a loading icon.
When data are well sent, a confirmation is displayed at bottom (example: 100px and Modules screen is displayed.
If there is a problem with one of scanned item, a message is displayed with errors. After confirmation, Modules screen is displayed.
If there is a problem with your account, an error message will be displayed. Current screen is displayed. You can click on Cancel and go back to previous screen. Please contact support for assistance.
Module Inventory
Inventory module will be used to perform Station Inventory Counts.
Click on  to start.
This module is available only if you have one of the following roles:
- SkylogistiX Global Administrator
- SkylogistiX Local Administrator
- SkylogistiX Operational
- Airline Field Staff
- Caterers
- GroundHandlers/Lounges/Ticket Counters/Cabin Service Companies
- Warehouse Customer Services
- Airline Administrator
- Airline Operations
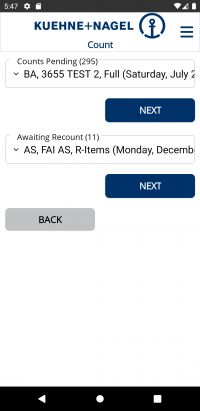
Count/Recount selection
By default, most recent count is selected. For each count/recount, the following informations are available:
- Airline code
- Depot code
- Count category description
- Expected count date
To continue, click on Next (first button is for selected count, second button is for selected recount).
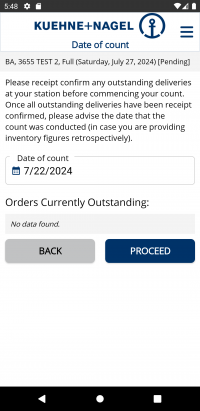
Date of count
When you start a count, you have to define the actual date of count.
Date is automatically filled with current day.
You can see below date field the list of current outstanding orders.
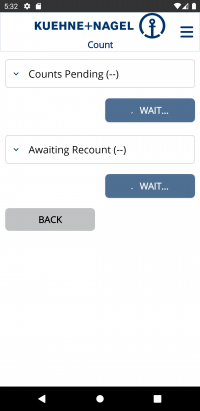
Click on Proceed to continue. While data are sent to server, buttons are unavailable (Wait + loading icon). Once done, Count items page is displayed.
Count/Recount items
When you start a pending count, count items screen are displayed. No values are filled for quantity.
On top, you can see information about selected count.
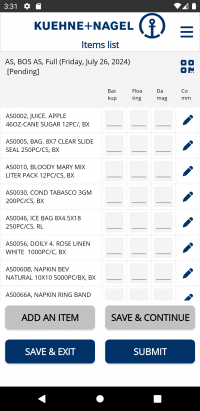
According to configuration of Station count, up to three columns can be displayed:
- Backup quantity (always available)
- Floating quantity
- Damaged quantity
When you want to fill a value, automatically, numerical keyboard is displayed when you type in field.
Once value is set, border color changes (so you can see which values changed).
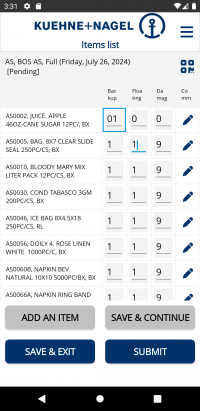
By clicking on Edit icon ![]() you can fill a comment on item. Once a comment is defined, border color changes (if you click on Edit icon again, you can see the comment and modify it).
you can fill a comment on item. Once a comment is defined, border color changes (if you click on Edit icon again, you can see the comment and modify it).
If you want to access quickly to a specific item, you can scan its barcode.
Click on QR icon ![]() , scan a barcode, then if item exists in list, it will be highlighted.
Example:
200px
, scan a barcode, then if item exists in list, it will be highlighted.
Example:
200px
Several actions are possible on this screen:
- Add an item (see next chapter)
- Save & Continue : Data will be sent to server. Once done, a confirmation message is shown and current screen is refreshed and you can continue. Highlighted borders are removed.
- Save & Exit : Data will be sent to server. Once done, a confirmation message is shown and Module screen is displayed.
- Submit : All quantities must be filled to submit count. An error message is displayed if there is some missing value. Once clicked, data will be sent to server. Once done, a confirmation message is shown and Module screen is displayed.
In case of problem with data, an error message will be displayed. Current screen is displayed. Please contact support for assistance.
Add an item
When you click on "Add an item" on Count items page, Add page is displayed.
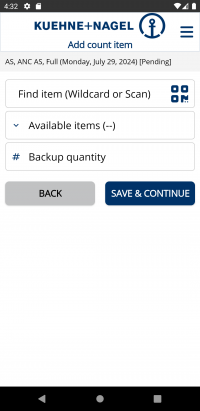
You can scan or type a value to get list of items that can be added according to typed value. The types value will be used as a wildcard to get matching items.
If only one item is available, it will be automatically selected.
Otherwise, you will have to choose a value in the list.
To add the selected item, you have to fill backup quantity.
After add, item will be added at the end of the list (Count items screen).
Secondary pages
Secondary menu is accessible from Menu button ![]() (to left of screen once connected) or by swiping from left.
(to left of screen once connected) or by swiping from left.
The menu is displayed above current screen.
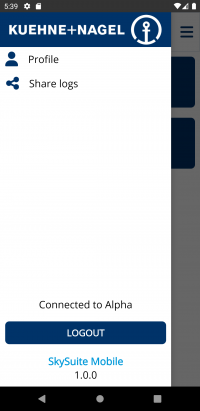
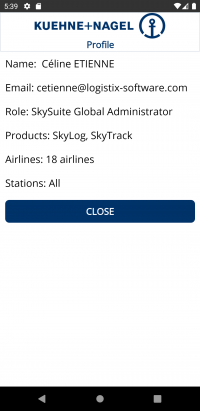
You can access several pages from links:
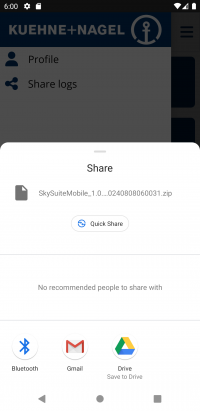
Installation
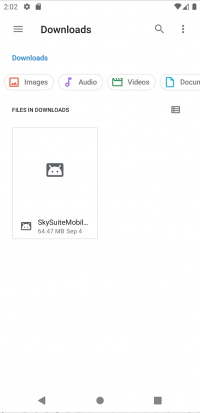
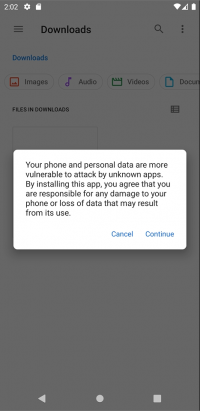
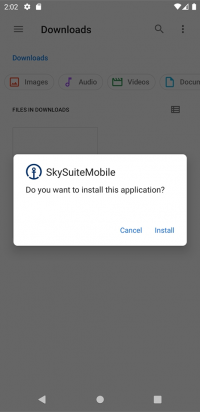
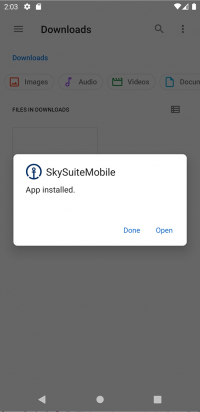
To install SkySuiteMobile, you have to get APK file (contact support to get it!). APK file is the Android Package that manages application on Android devices.
